
An Introduction to Injection Molding
An Introduction to Injection Molding
At Hayco, we’ve been a trusted manufacturing partner for the world’s leading brands for more than 35 years. One of our specialities is the art and science of injection molding. To demystify this dynamic manufacturing process, we’ve put together a short beginner’s guide.
What is injection molding?
Injection molding is what it says on the tin: a process of injecting a mold with a molten plastic material, to create plastic component parts on a high-volume scale.
There are dozens of fabrication techniques available today, from machining to thermal forming to 3D printing—the innovation everyone loves to talk about. Each has its own benefits and limitations. When you’ve got to create thousands—if not millions—of the same plastic part, injection molding is a very effective way to scale up your production.
Our customers span healthcare and consumer lifestyle products, and they find that this form of manufacturing is especially useful for small, detailed parts, including joints, brackets or plastic housings. So what are some of the advantages of injection molding?
1. Less waste
Injection molding uses a family of materials known as thermoplastics. These can be melted, cooled, solidified and melted again without burning the plastic. This makes them recyclable over and over again. Even excess material can be reused in the next round of molding. The ability to reduce the ‘piece count’, or total number of parts, also simplifies final assembly and minimises the amount of scrap generated.
2. More Speed
The process of injection molding can be fully automated, so parts can be mass-produced very quickly. Another advantage is that processed parts come out looking very finished, which minimises the time and resource needed to finish and treat the final products. They’re good to go.
3. Greater detail
Mold tools can be made from aluminium or steel, and we can create highly detailed, intricate plastic parts from these. We can also finish the parts within the mold in different ways, giving you another dimension of creative control over the final product.
The Process: From Prototype to Production
Stage 1: The design
Let’s imagine you’re designing a nozzle for a tube of toothpaste. The first crucial step is making sure you have a design ready for production. When you start producing on a large scale, every second is important. Ensuring you have the most simple, elegant solution early in the process will make a big difference to the bottom line when the volumes are huge. There are plenty of resources available to explore this, including CAD technology to visualise the final product.
This is also the stage where you might discuss the best thermoplastic for your purposes. What quality does it require? How durable or flexible does it need to be? What level of detail is involved? Once you’ve answered some important questions, you’re ready to take your design to the prototype stage.
Stage 2: Prototyping
Technology has come a long way. While 3D printing isn’t ideal for mass-scale production, it is a great way of prototyping. Using a different plastic, you can create your plastic part with a 3D printer to better understand its form and function.
We’re also capable of running simulations with advanced software, where we can see how your mold tool design will perform and ensure it’s not defective. This can help us to better plan for gate locations (the tiny channels in the mold that direct the molten material into the design) and make sure overflows are unlikely.
Once that’s happened, we’ll look at an initial production round, which can typically generate between 300 to 1000 molded protoypes, made of your chosen material. This is when we see if the mold tool is up to the job. We refine and perfect it before rolling it out for mass production.
These first two stages require the longest lead time, and incur the greatest costs associated with injection molding. Finalising the tooling is the most complex and technical part of the process, but it’s a worthwhile investment. Tools are typically made from hard metals, so it can be very difficult to make changes to them. In a worst-case scenario, if the groundwork hasn’t been laid, an entire tool may need to be scrapped and started over—at a high cost.
However, if everyone does their due diligence and the tests are effective, you’ll be able to make dozens, if not hundreds of toothpaste-tube nozzles in a matter of seconds, without having to pay and wait to fix individual cavities or mold tools after each round of injection molding.
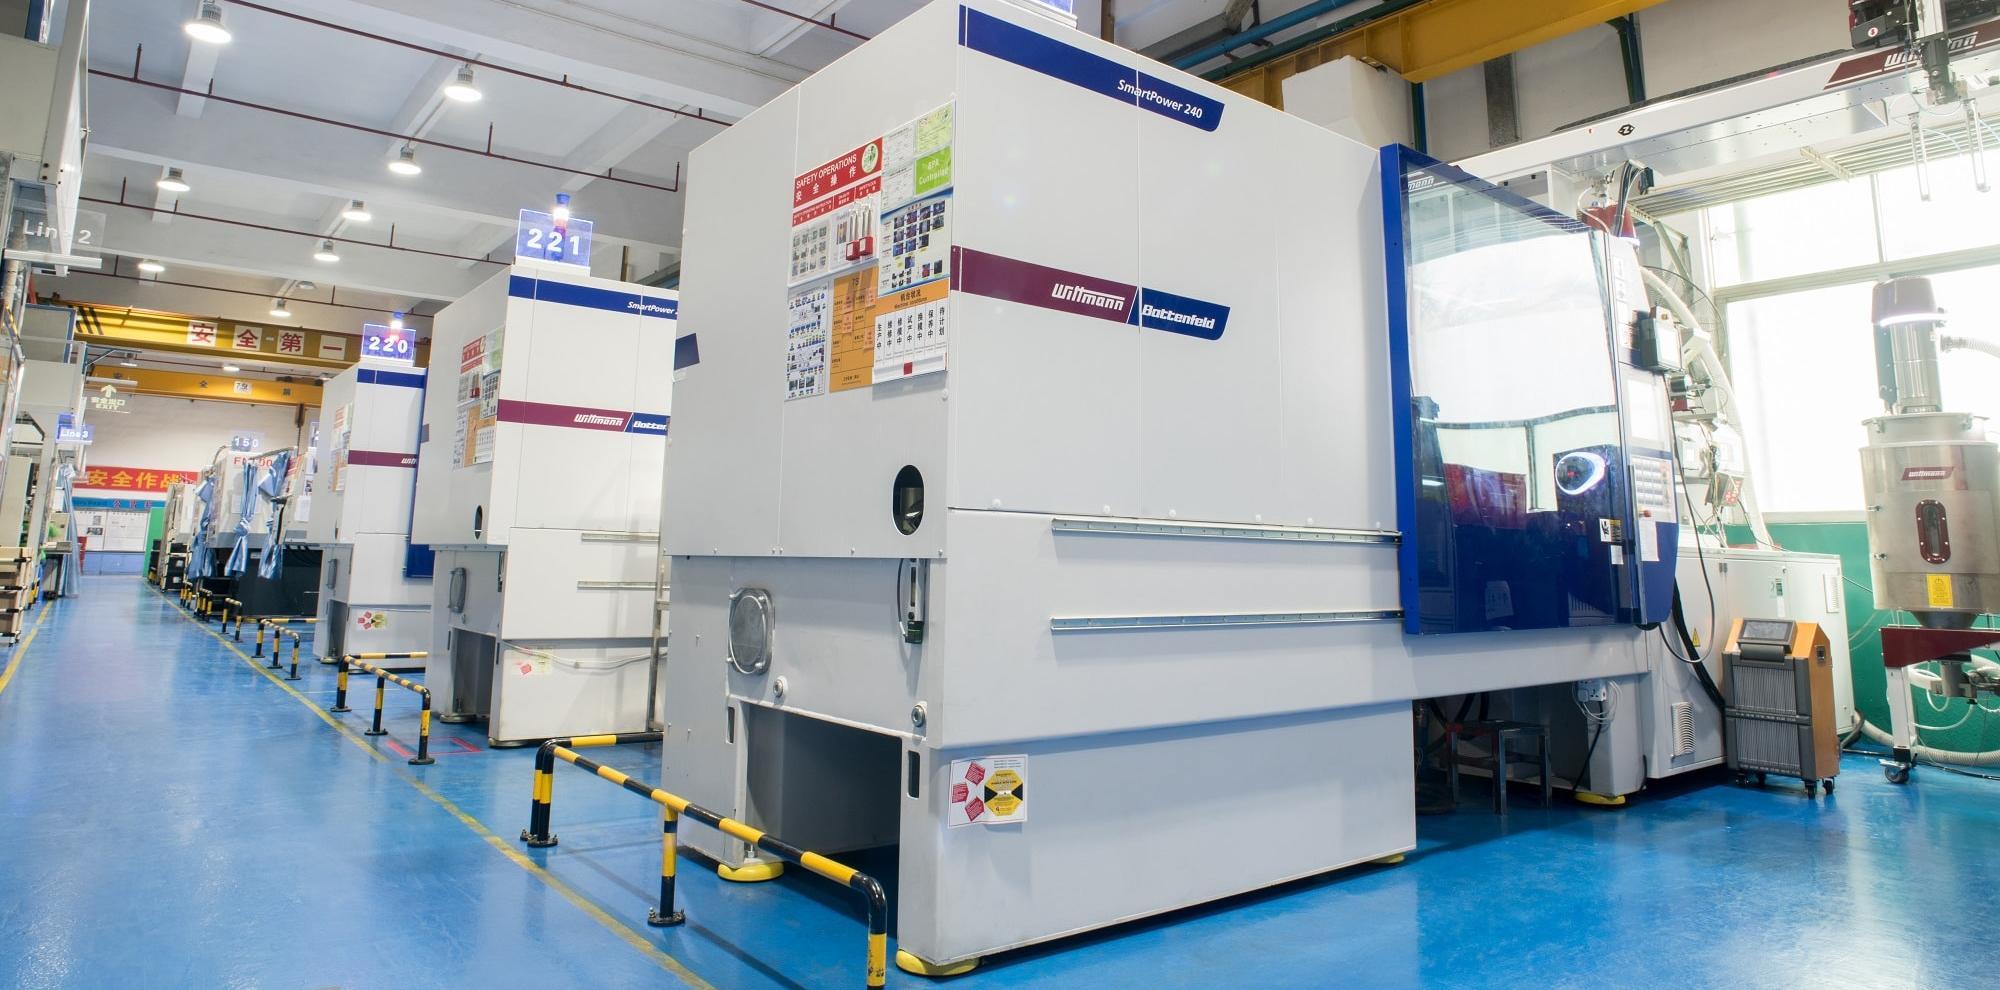
Stage 3: The big machines
Once the molding tool for your nozzle has been finalised and created out of metal, the plastic injection molding machines are loaded up with as many molds as required. In stage one, we discussed the right thermoplastic for your design—and in stage two, we test this with prototypes and simulations.
The plastic injection molding process starts when resin pellets of the thermoplastic material are melted to the right consistency. Next, the liquid is injected into the molds through an entry point, the sprue, where it flows into runners, then gates—think of them like rivers into streams—and finally fills the cavities for the plastic parts: your nozzles.
The material is then rapidly cooled so it hardens into its final form. The mold opens, and small ejector pins ‘pop’ out the parts. All the cooled, solid plastic leaves the mold, so it’s clean and ready for the next round. Any overflow and ‘flash’ is collected and added back into the next batch of material as ‘re-grind’, before the entire process is repeated again. The completed parts are taken for assembly or sorting, and production continues.
The complete injection molding cycle is rapid. It lasts only a few seconds, and once it gets going, parts are churned out consistently, reliably and quickly. The faster the cycle time, the bigger the savings.
What about costs?
The key to making injection molding work for you and your budget is to understand the whole process from the very beginning. An experienced manufacturer can determine at what volume injection molding becomes the most cost-effective method for production. The majority of costs associated with injection molding are in the initial set-up, but once you’ve got that sorted, the price of production per unit drops dramatically with increased volume. However, for smaller production runs, other manufacturing methods might be more suitable.
When is injection molding not suitable?
The lead times and set-up costs are the biggest drawbacks to injection molding, which is why the technique works best for high-volume production. Often, if you’re looking to mold plastic into a very large design or component part, such as a plastic supermarket trolley, you’ll need huge pieces of machinery and equipment—and prototyping might also be a challenge, as a 3D printer can’t always handle such big designs. For these sorts of projects, you’ll need to think about multiple pieces that can be bonded together, which can increase assembly time.
Looking to learn more?
The manufacturing process is driven by engineers, innovators and designers who live to solve problems. If you’re ready to take an idea from drawing board to production line, talk to our team.